We, at RedTrack.io are primarily interested in two things: providing you with an unchallenged tracking experience and giving you a comprehensive control over all the trackable metrics.
We are glad to announce that now, RedTrack not only provides tracking of clicks and conversions but ad impression tracking as well. When used with other tracking metrics, impressions give you a vital overview of your ad campaign performance, like where you have more impressions and fewer click-throughs, or vice versa.
What is impression tracking?
Impression is the number of times a banner ad is viewed. It is a non-action-based metric that is used to track the first interaction of a user with an ad.
Impression tracking is a powerful metric. Use it to measure the difference between the number of opportunities a user might click on the ad, and the actual quantity of clicks.
When tracking the impression, your campaign reports will have far more clarity. Control bigger amounts of data and have a complete view of the total effectiveness of your ad campaigns.
How to use impression tracking in RedTrack?
To track impressions in RedTrack, you need to make several easy steps:
1. Go to the Traffic Sources tab. Use either the Source from the list of pre-sets or create a new one.
2. Navigate to the impression tracking attributes.
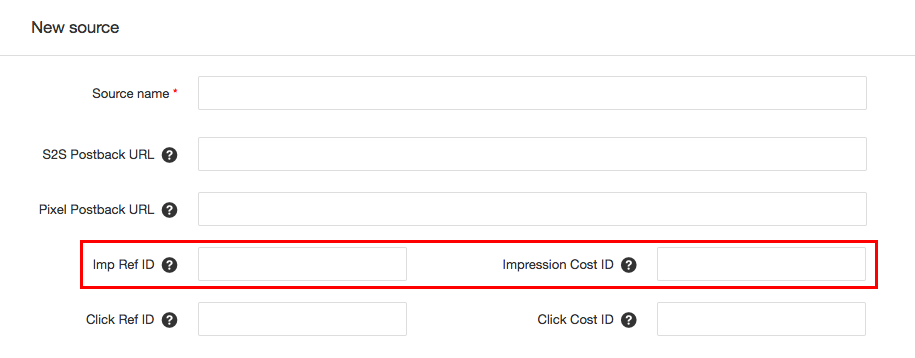
Insert the corresponding macros of the Traffic Source of your choice, where:
Imp Ref ID — traffic source macro for imp_id. Important if you plan to postback impressions to the source.
Impression Cost ID — traffic source macro for impressions cost. Important if you want to get individual cost data for each impression.
Note: Make sure, the Traffic Source of your choice supports impression tracking.
3. Click the Save button. Along with click tracking, you have now enabled the impression tracking for the Traffic Source entity in RedTrack.
4. Set up your campaign in RedTrack. To do so, go to the Campaigns tab. Enter all the obligatory entities and choose the Traffic Source, where you have activated the impression tracking option. Save the campaign. RedTrack will generate two tracker URLs: one for click-based attribution, another — for impression tracking.

Copy both links and insert them on the Traffic Source side.
With impression tracking option, you might use a CPM cost model in campaign settings. If Imp Ref ID and Imp Cost ID macros set right, you now receive an accurate information on the number of actual impressions made and the cost of each individual impression —> super precise CPM tracking.
Note: With RedTrack, you can not only get an insight about the number of impressions and their cost, but also postback all this and other information to the network. With the growth of requirements towards transparency in advertising, this option would be of particular interest to both affiliates and advertisers.
View impression data within the reports
RedTrack captures all the values populated by each macro, used by your Traffic Source. This data is collected and generated for your tracking reports.
With impression statistics, receive more information about the traffic you buy and run straight into your RedTrack account. Use this information further, and optimize your ad campaigns at the level of both clicks and impressions!
Stay Tuned!
Right now, we’re working on an impressive set of functions that are aimed to provide you with entirely unchallenged and efficient tracking experience. Join RedTrack Community on Telegram and be always up-to-date on tracker update, industry news, and bonus giveaways.