If you doing at least some advertising, you probably already faced issues with Facebook Ads ever since the iOS 14 Privacy Update was released. If you still didn’t get your Business Manager blocked (lucky you!), you probably heard about the shift to Facebook Conversion API and a requirement for domain verification in Facebook Business Manager. The latter one has been quite a problem for everyone who does not have access to the domain where the actual conversion event happens.
If you want to learn more about Facebook CAPI, we suggest you read our previous article “How Facebook Conversion API changes advertising?”. But if you still haven’t figured out how to verify domains (especially when it comes to affiliate landing pages), this piece of content is for you!
By the way, if you still didn’t figure out how to integrate CAPI, start conversion tracking & optimize for the events of your choice, check out the guide our team prepared!
Fasten your seat belt, we will drive you through a domain verification solution 😎
Why do you need to verify a domain on Facebook?
Domain verification in Facebook Business Manager requirement came right after the iOS 14 Privacy Update by Apple was rolled out. Domain verification is necessary for Facebook to promote privacy and make sure that only trusted people are using the account.
Besides, when you verify the domain gives you the right to manage permissions over your links and controls the “misuse of your account” as Facebook states.
Note: you can’t make edits to your Pages unless your domain is verified in Facebook Business Manager.
Another reason is that after domain verification Facebook receives the data to enable prioritization of 8 conversion events per domain. Without this data, Facebook Business Manager can not make a priority for designated conversion events. The decrease of available conversion events for measurement is also the consequence of the iOS 14 Privacy Update.
If you want to learn more about the topic, make sure to read this article — After iOS 14 Update: How to save our ads (BONUS! Find preparation checklist in the article).
Also, check out the latest step-by-step guide on how to implement Facebook Conversion API with RedTrack for you to be able to track conversions and improve attribution with Facebook Ads 😏
Ways of domain verification in Facebook Business Manager
There are 3 main ways to verify a domain in Facebook Business Manager:
-
DNS Verification;
-
HTML File Upload;
-
Meta-Tag Verification.
We find that DNS Verification is the simplest option. It is easy enough for a simple marketing & advertising expert who never made a piece of code longer than “Hello World!” pop up.
However, the DNS verification requires access to the domain settings. Which you typically can not find if you do not own the domain. So that’s the case when affiliate marketers & other advertising partners may suffer. Facebook did not provide an opportunity to perform verification for third-party domains. Verification can be made only for domains where conversion events happen — this is a way to promote transparency.
Solution for third-party domain verification in Business Manager
Putting interests of affiliate marketers & other third-party advertisers in the first place, our team at RedTrack.io started looking for the solution. Actually, like we always do 😉
What we managed to do is to provide you a chance to verify your third-party domain through our tracking & attribution platform. If you use RedTrack as your tracker you will manage to verify your affiliate landing page in no time.
In a nutshell, we make sure that all you have to do is to verify the domain (where conversions happen) inside a tracker and our platform will do the rest to make Facebook think that your Landing page is the actual place of conversions.
If you haven’t tried using our tracking & attribution solution before, we provide a 14-day free trial for you to properly test our platform. So you might try set up Facebook CAPI integration and verify your domains as well.
Step-by-step guide: how to verify domain with RedTrack
Let’s get right into the step-by-step guide on how to verify the domain in Facebook Business Manager using the RedTrack platform.
1. Go to your Business Manager account ➡️ Brand Safety ➡️ Domains
 2. Press Add button ➡️ Add your domain
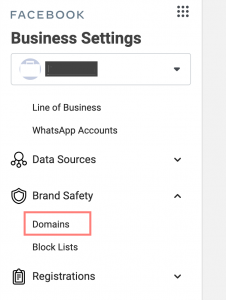
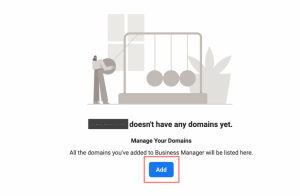
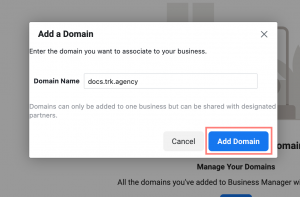
Domains will not appear in your list immediately, give the system some time to replicate the data.
3. Select the target domain, choose DNS verification
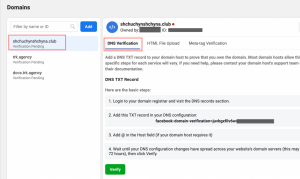
4. Copy your unique TXT value and go to your domain registrar
 5. Open DNS settings and add a new record with the following values:
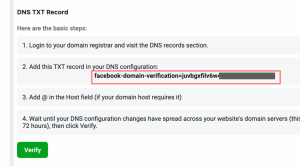
Host: @Points to: your unique TXT record from point 4TTL: the lowest possible
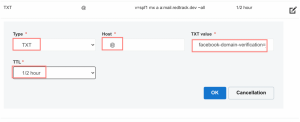
The steps you need to perform to add a DNS TXT record to your DNS settings may vary by domain host.
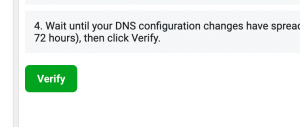
Wait for some time for the data replication and press verify button in your Facebook domain settings.
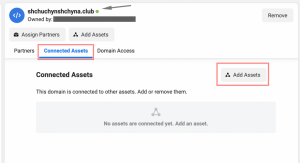
 6. Associate the domain with your page:
Green spot means the domain is verified.
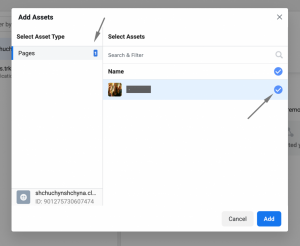
7. Proceed with the rest of the setup
Once you are done with setting in Facebook, you can proceed with the rest of the set up on the RedTrack’s side.
Make Facebook accept the conversion domain from RedTrack. To do that, add the same domain you have already verified inside your RedTrack offer settings.
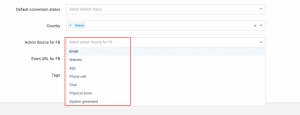
Set the Action Source (the type of the conversion to be set for Facebook API):
Add your verified domain here (a root domain will work fine as well):
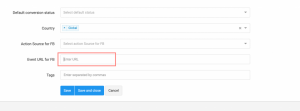
The domain should be secure, use the following link format: https://your.domain.com
Domain verified, advertising secured
We hope that this simple guide made it possible for you to verify your domain and continue advertising through Facebook. RedTrack’s team is always happy to have your back when another painful update from the advertising giants roll out.
Join our Private Community on Facebook dedicated to tracking & attribution with Facebooks Ads: find all the answers about CAPI, domain verification, attribution & more.


